We just want it because it’s new. You know some fancy audio stuff? Send us a message!
Music is in general a versatile when it comes to how you make it. There are people who use literally garbage and whatever they have on hand, others pay thousands of money to get high quality equipment, some renounce the world of already existing instruments completely and only build their own, the habits and workflows are almost uncountable.
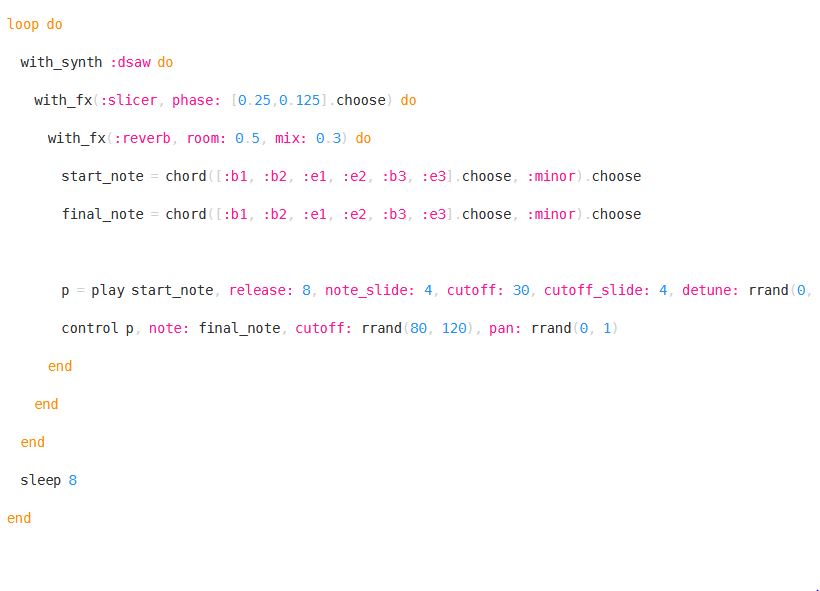
Recently I stumbled over another, very special and mostly unknown way of making music; live coding with Sonic Pi. Yes you read right, a programming language is used to write a program in realtime which then creates music based on the logic you coded. It is running on Windows, MacOS and (as the name suggests) on a Raspberry Pi. See the video below for an impressive example.
Sonic Pi offers sample based music creation as well as synthesizers and oscillators to create our own waveforms. Furthermore you can use effects and even a microphone input, one can only imagine how versatile the opportunities are when combining (musical) creativity with the possibilities of programming. The language itself is as simple as possible, in order to enable people with few or no coding experience to get started.
Sonic Pi is an Open Source Project released under the MIT Licence. It was originally created by the University of Cambridge Computer Laboratory, today it is maintained by Sam Aaron and the Sonic Pi core team.
If you are interested you should definitely check out Sam Aarons Youtube channel where he offers tutorials and examples to get started (besides other work).
Are you tired of making music just for good sound? Have you played all the scales and used all the PlugIns in every DAW? Are you searching for a new meaning for your music and with that, for your live?
Maybe it is time to get into Oscilloscope Music!
The idea is to use an Oscilloscope to draw images and even create moving ones. This is done by having two audio channels visualized on the oscilloscope in the so called “X-Y-Mode”. While in many cases an Oscilloscope shows the change of the voltage of a signal over time, the X-Y-Mode shows two channels modulating the display at the same time, with one channel controlling the X deflection and the other channel controlling the Y deflection.
An example;
Imagine, at a certain moment in time both channels have the value “1” (no units, just “value”). The screen of an oscilloscpe can be visualized as a coordinate system, like back in school. The zeropoint ((0, 0) e.g. no signal connected or signal is silent) is in the middle of the screen, so if both channels equal “1” (written (1, 1)) a point is drawn in the upper right corner. Respectively, if the channels equal (-1, 1) the point appears on the opposite side of the zeropoint.
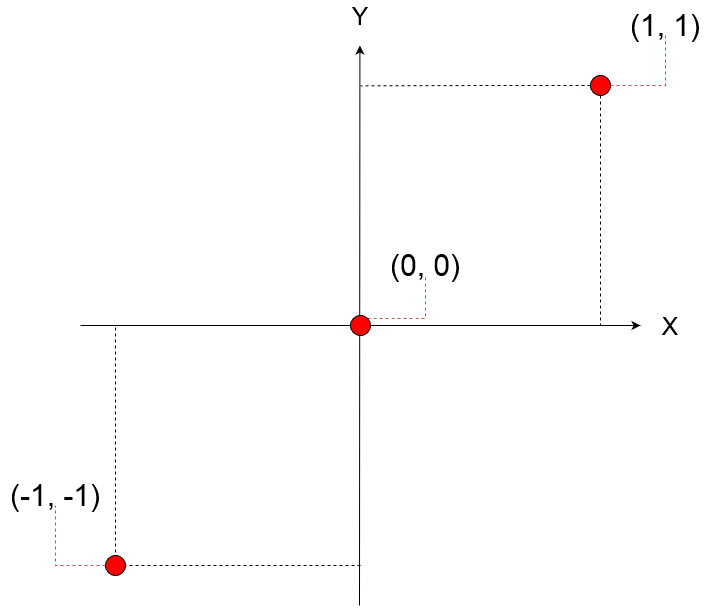
If we now imagine we apply a simple sinewave of e.g. 1Hz to each channel, the point starts to move in a circle, as the values slowly change from 0 to 1 to -1 to 0 again. By changing the frequency of the input signals we can achieve a full circle instead of a moving point as the point is moving so fast that our eyes can not see the movement anymore and start to visualize a connected circle.
Jerobeam Fenderson went several steps further and created audio signals that again create whole images and even “films” on an oscilloscope. As a result the music created by this work does not focus on sounding good but literally focuses on looking good. Of course he is not the only one in this field but definitely one of the best ones!
So the next time you get bored of creating hits, consider drawing images with sound and send them to your friends to hear your last weekend visually, if that makes sense…
If you do not have an oscilloscope you could use a balloon and a small piece of mirror to get to play with kind of similar results for cheap, Steve Mould is showing it here (I know, we used that link before but it fits too well :))
Linklist:
https://oscilloscopemusic.com/
Jerobeam Fenderson’s Youtube Channel:
https://www.youtube.com/user/jerobeamfenderson1
Steve Mould’s Youtube Channel:
https://www.youtube.com/channel/UCEIwxahdLz7bap-VDs9h35A
Tinkering / improving /stunning art ?
Most people today will have heard of 3D printers but most of the time it is still a mystical thing, attached to expectations from 3D printed organs to “be happy when you get a straight cube!”. Since I bought one of these mystical machines a few years ago I stumbled across some really impressing, impossible and ingenious ideas connecting the art of precisely melting plastic with the art of producing and controlling air pressure waves.
Controllers
A very good project in general is to create a personal MIDI controller. This introduces the creator to basic coding, designing and using the printer to combine all the parts.
When people get crazy with this, artist like Onyx Ashanti are born, an inventor and musician that built his own interface for live performances and experiments. The whole body is used to create control signals for software. While this is not directly an instrument or an acoustic device, it would be far more difficult to create a personalized controller like this without the help of a 3D printer.
Onyx Ashanti at “Tedx Talks” Berlin

Replicating rare and unique musical parts
One very reasonable way to us e a 3D printer is to create parts for existing, well designed objects, like in this case old an unique instruments. Scientists try to replicate the shape and sound of the original instrument as precise as possible in order to make it playable without destroying important parts.
3-D Printing Antique Musical Instruments (Parts & Replicas)
3D printing whole instruments
If this is not satisfying enough for you, take a look at Olaf Diegel and his Youtube channel. Need a new Alto saxophone but you do not want to buy it? There you go! Olaf Diegels 3D printed Alto saxophone
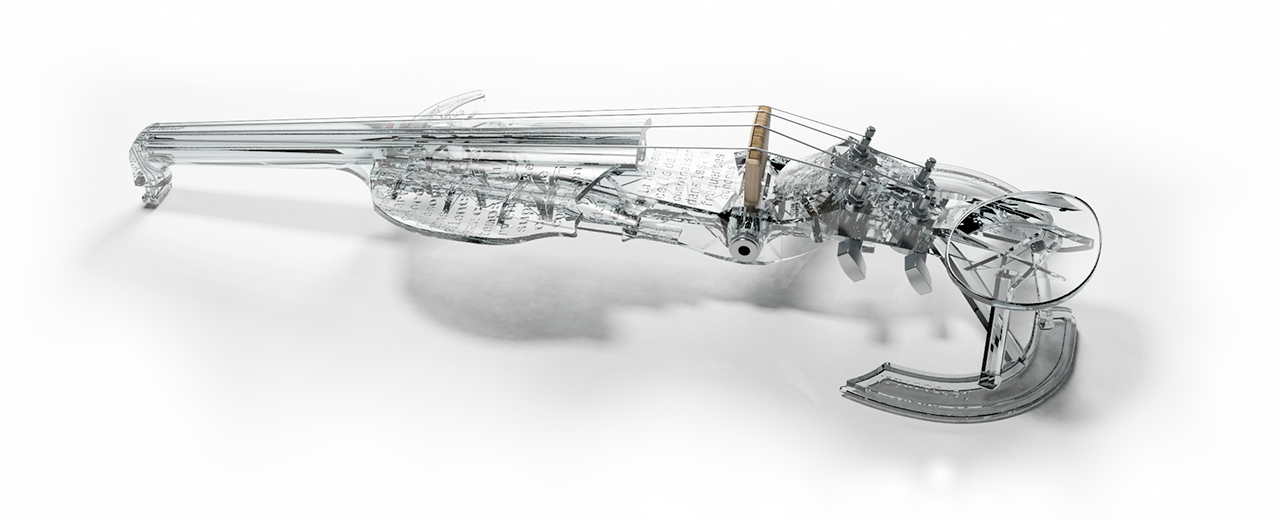
3DVarius is a company the designs and prints electric violins for normal and special needs. These look quite fragile, especially when thinking of the tension of the strings but they are complete instruments that sound and especially look amazing. See the Printed violines in action.
3D printing speakers
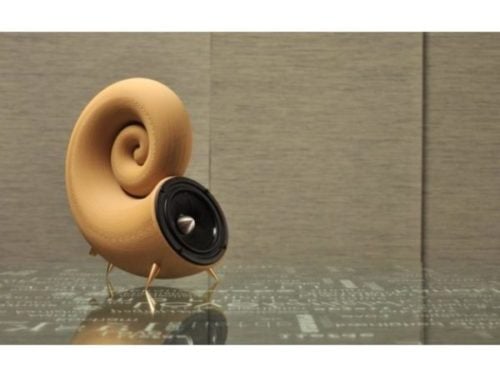
Speakers are indispensable for music and many people have started to build their own speakers from scratch decades ago, when 3D printers weren’t even born. However, a 3D printer makes it possible to create complex shapes and manufacture them precisely without having a whole wood or metal workshop in the basement. The amount of knowledge gained by tinkering around with designs, materials, stiffness, different speaker modules etc. can not be assessed. Furthermore, if done right they sound really good. If you are interested in some more work with speakers, check out HexiBase’s Youtube channel where he built quite a few of them.
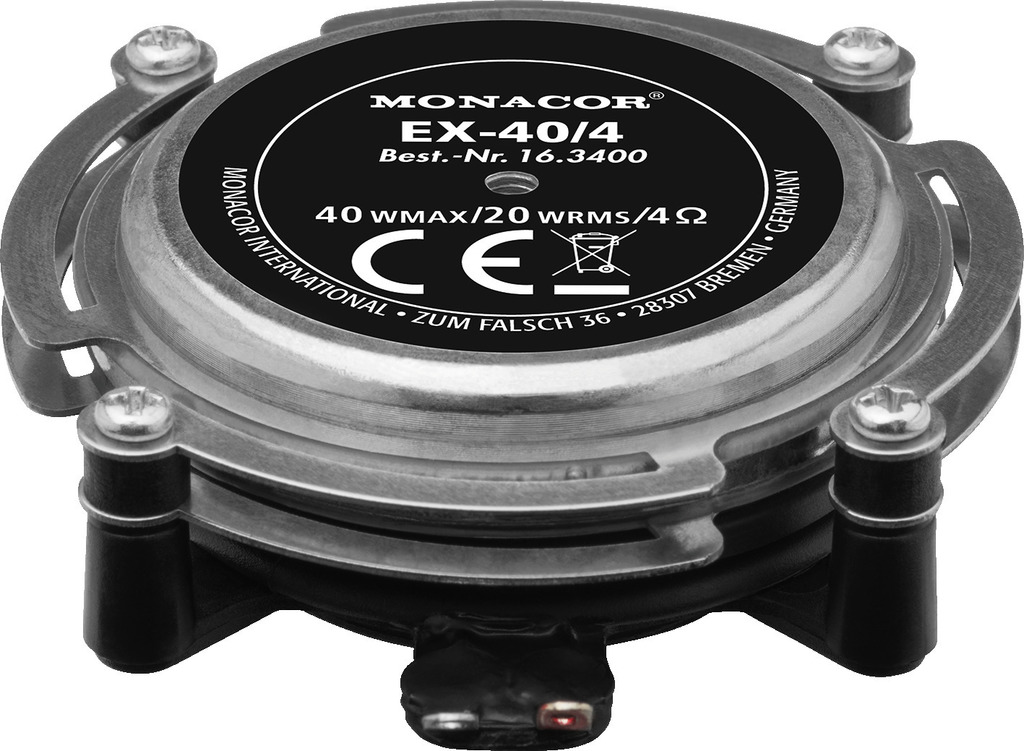
A standard speaker is an electroacoustic transducer, converting electric energy into acoustic energy by vibrating a diaphragm and thus creating pressure waves in the air. Audio exciters (sometimes also called “audio transducers”, “bodyshakers” or “sound actuators”) don’t use a diaphragm to convert energy but every rigid object that you want to use as a speaker. Imagine a speaker without the diaphragm. When connected to an amplifier it starts to vibrate but due to the missing surface the generated waves are not strong. An Exciter is more or less the same but gets directly attached to e.g. a table which replaces the diaphragm, meaning that the whole table starts to vibrate and emit sound. Of course the spectral characteristics of a system like this highly depend on material and shape of the object to which the exciter is attached. But by using equalizers and gathering experience and knowledge about materials, shapes and their acoustic effects you can get interesting experimental and / or aesthetic results.
A very aesthetic use of this technique are planar speakers which use a specially configured plate and exciters to create very thin speakers. The exciter(s) get attached to the plate and filtered to get a good frequency response. Because of the missing diaphragm and a radiation characteristic which is quite adjustable the finished build / product can be very thin.
Exciters are used in automotive acoustics too, making the use of the cars interior as a speaker possible. The advantage in this case is mostly saved installation space and weight.
Unfortunately this form of transducers is not widespread but here is an example of a company using it to create invisible speakers:
https://www.novasonar.de/en
Further information about acoustic exciters (company pages):
https://www.puiaudio.com/pages/invisible-speaker-exciters
https://www.visaton.de/downloads/pdf/visaton_exciter_principles.pdf
Did you know you can use a laser as a microphone? By pointing a laser on an object and carefully observing vibrations of that object it is possible to gather information about sound waves in that area. The rumor goes that laser microphones were used to spy on conversations inside the Ecuadorian embassy, the hideout of Julian Assange for several years.
If a sound wave hits an object, said object starts to vibrate. By carefully measuring the distance towards the vibrating object it is possible to recover the soundwave that introduced the vibration. In the case of Julian Assange, some people assume this technique was used to record vibrations on windows, making sound recordings by security agencies possible.
Disregarding the question whether this happened or not, the technique is using high precision optical measuring techniques, making the topic difficult to explore at home.
However, in some cases it is even possible to gather acoustic information analyzing a video. The youtuber “Veritasium” visited Dr. Abe Davis, a Stanford PostDoc, to create a small presentation of this technique. The special part is that in this video no high quality camera or optical equipment is used. Instead all information is gathered by filming a cheap bluetooth speaker with a standard camera.
The basic principle behind all these techniques is sound waves vibrating objects. Luckily for all of us who want to try this and don’t want to spend too much time with reading and building, Steve Mould, another youtuber, created a very neat video in which he uses a speaker and a balloon with a small piece of mirror on it to show these vibrations. By pointing a laser on the piece of mirror and vibrating the ballon via the speaker, the laser gets deflected creating beautiful patterns on the wall.
Linklist:
Homepage of Abe Davis:
http://abedavis.com/
original video of Brian Mackenwells, inspiring Steve Mould:
https://www.youtube.com/watch?v=IU_ca58Sx5M
Project of building a laser microphone by Mark Chounlakone, Julian Alverio in collaboration with Justin Tunis:
https://web.mit.edu/6.101/www/s2017/projects/jalverio_Project_Final_Report.pdf
wikipedia; Laser microphones
https://en.wikipedia.org/wiki/Laser_microphone
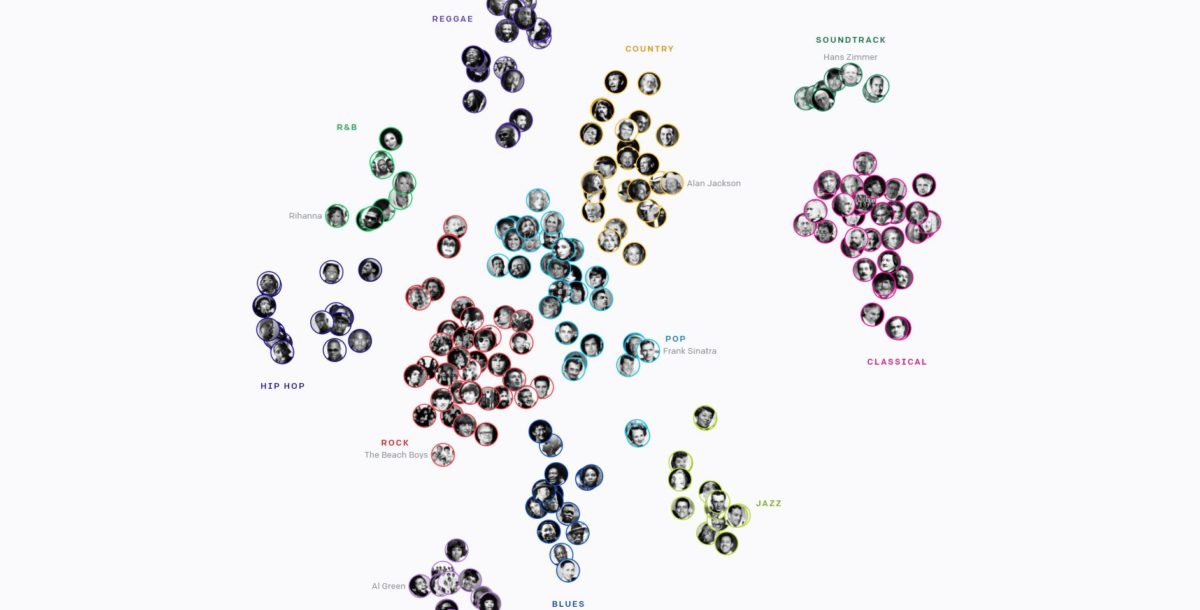
Listen to music which is generated by a neural net, well by a computer. Open AI also released the model weights and code, along with a tool to explore the generated samples. Keep on rockin!

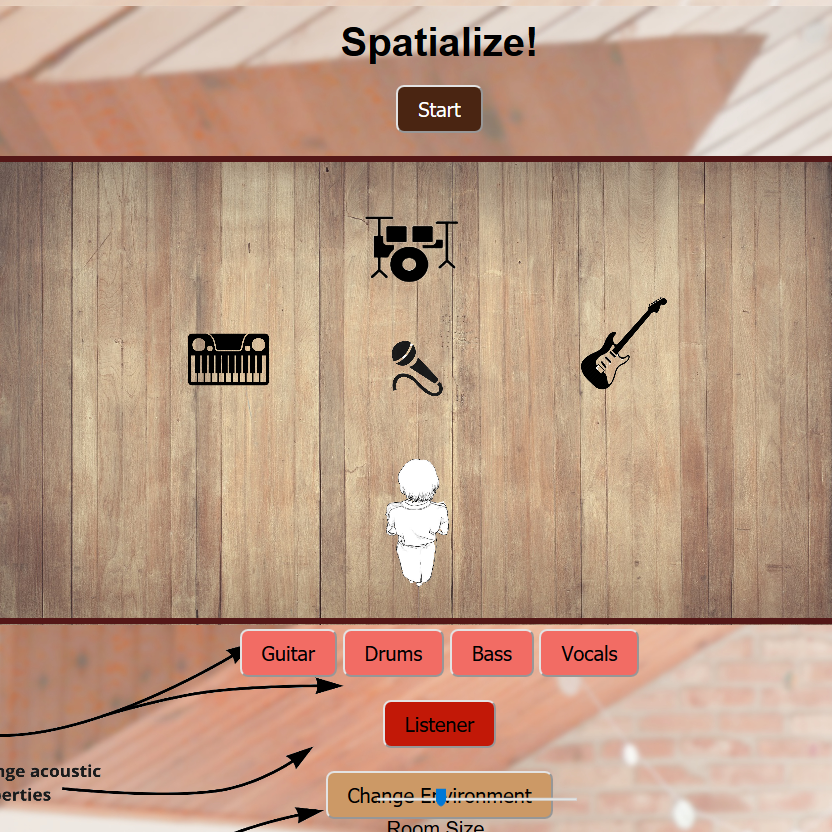
Demonstration of cool Real-Time Speech Separation. Many thanks for contributing to David Ditter from Signal Processing Group at University Hamburg. You like this? Get in contact!
Pretty impressive noise cancellation software. You can read the setup guide and download here or just get an idea of what is possible from the following videos.